A strong course can take 8-12 weeks to build, so an expert may hesitate before packaging useful knowledge for sale. The GetResponse AI course creator may help you turn that expertise into something you can teach and promote. Yet ease of creation matters only if the tools also fit how you reach learners.
Your best choice depends on your workflow, audience, and selling needs. You need a course creation process that supports your teaching style, plus marketing tools that help people find your offer. The right fit can make the work feel more manageable, but no platform can decide what students need to learn.
This review looks at five areas: AI-assisted structure, lesson customization, course sales, promotion, and student engagement. It also weighs the workflow, trade-offs, and fit, so you can decide what to test during a free trial.
Key Takeaways
- AI can suggest a course structure, but you must check its accuracy and teaching value.
- You can shape lessons with text, video, audio, PDFs, webinars, and external materials.
- Stripe and PayPal are identified payment integrations for paid courses.
- Email marketing, landing pages, webinars, and automation can support course promotion.
- Check plan limits, payment costs, and your teaching needs before you commit.
How Does the GetResponse AI Course Creator Work?
An AI course builder can speed up planning and drafting, but it cannot replace your subject expertise. An AI course outline is a machine-generated sequence of modules and lessons that you review and revise before publishing.
AI course creation tools can help you shape a starting plan and draft some material. You remain responsible for accuracy, useful examples, and clear learning goals. A generated structure can sound tidy while still missing what your learners need.
An AI-generated structure is a starting point, not a finished teaching product. You must check its facts, examples, and order.
During online course creation, AI may support tasks such as:
- Brainstorming possible topics and course angles.
- Organizing broad topics into lessons and modules.
- Drafting content that you can edit and fact-check.
- Suggesting assessments that match your learning goals.
These tasks can reduce blank-page work for course creators. They do not tell you whether a lesson is clear, whether an example fits your audience, or whether an assessment checks the right skill.
For example, an AI tool might suggest a lesson on budgeting, then draft a basic explanation. You still need to add a realistic example, check any figures, and make sure learners can apply the idea.

Use AI for ideas and structure, then bring your own judgment to every lesson. That distinction matters whether you teach a hobby, a work skill, or a complex subject.
The general role of AI is only the starting point. The next practical question is how to move from an account to a working course structure inside GetResponse.
How Do You Start Building a Course in GetResponse?
A creator can set up a profile first, then name a new course and shape its structure. The profile gives your course a recognizable creator identity, while the course shell holds its first framework.
You can start with an AI-proposed structure or add modules by hand. The choice lets you use course creation tools in a way that suits your comfort with automation and your teaching plan.
Set up your creator profile
Begin with your name, a short bio, an avatar, and social links. These details help learners understand who is teaching and where they can learn more about you.
The setup takes about 2-5 minutes. You can use a free GetResponse subdomain or connect a custom domain, depending on how you want learners to reach your course.
Keep the profile clear and consistent with the name you use elsewhere. A familiar photo and a useful bio can make a new course feel less anonymous.
Create the course shell and add modules
Find the course creation area and create a course with a name learners can understand. You can ask the course builder to propose a structure, or add modules manually.
Next, organize lessons inside the modules and add the materials each lesson needs. Keep the first framework simple, since you can refine the order as you develop the learning experience.
| Setup step | What you provide | What it establishes |
|---|---|---|
| Creator profile | Name, bio, avatar, social links | A branded creator identity |
| Course shell | Course name and initial structure | The course’s starting framework |
| Course access page | Free subdomain or custom domain | The address learners use to reach the course |

That table shows how each early choice serves a different job. A profile identifies you, a shell organizes the course, and an access page gives learners a route in.
Once the course shell exists, the next decision is what learning materials and formats your learners will use.
What Learning Materials Can You Add to an Online Course?
A lesson can explain a concept in text, or pair that explanation with a demonstration and a downloadable reference. Different formats can make online learning more varied when each one helps learners reach the lesson goal.
You can add text, video, audio, PDFs, webinars, and external learning materials. Choose each format for a teaching reason, not just to make a lesson look busy.
- Text can explain steps, terms, or ideas learners need to review.
- Video can show a process that is hard to explain in words alone.
- Audio can offer spoken lessons or commentary for focused listening.
- PDFs can provide worksheets, checklists, or reference material.
- Webinars and external materials can add live teaching or useful resources.
A mix can support a stronger learning experience, but every format should have a job. A short video may show a repair technique, while a PDF gives learners the steps to follow later.
Manually adding modules is also an option if you want to shape the structure yourself. You can plan the order around a specific skill, then choose materials that support each stage.

A common mistake is assuming that uploading a folder of files automatically creates coherent learning management. Learners need a clear order, instructions, and a reason to use each item.
A thoughtful choice of formats leads to the first key feature: AI-assisted course structure and the work it can save.
Feature 1: How Does AI Help Structure Your Course?
Creating a strong online course from scratch can take about 8-12 weeks. AI help can reduce some planning work, but it does not turn an idea into a finished course in minutes.
Traditional planning and research may take at least 2 weeks, while content creation may take about 4-6 weeks. Those stages still need your time, even when a course builder suggests an outline.
You can give the AI a course idea and use its suggested modules as a draft structure. It may group related subjects and offer a path from basic lessons to more advanced material.
That order can help learners build knowledge step by step. Someone learning photography, for example, may need camera basics before practicing manual exposure.
Still, an outline can leave gaps or place ideas in the wrong order. Check each module against what learners already know and what they should be able to do afterward.
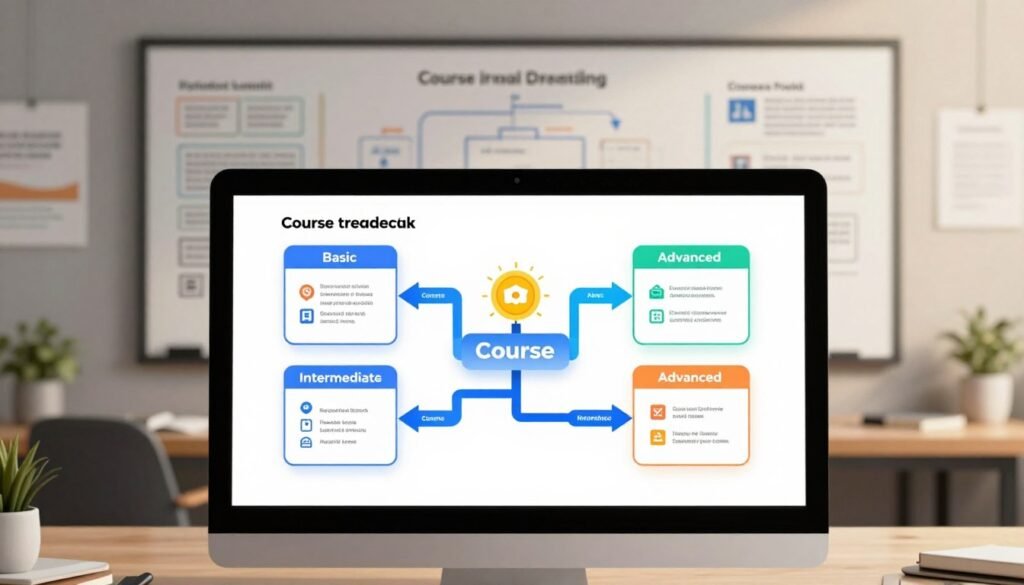
Useful key featuresai course planning starts with a clear audience and result. If learners are beginners, a draft full of advanced terms needs revision before it can guide them.
AI assistance may shorten some manual work, especially when you need a first pass at structure. You must still add accurate teaching, examples, and useful checks for understanding.
Once the structure makes sense, the next task is refining and filling the lessons to fit your material and teaching style.
Feature 2: How Can You Customize Lessons for Your Learners?
A short video demonstration can show a task, while a downloadable reference helps learners repeat it later. Each piece serves a different need, so a lesson can support both watching and practice.
You can edit modules, arrange lesson content, add supported media, or link external resources. You can also build modules manually when you want full control over the structure.
For example, a cooking lesson might show a knife technique in a short video. Written steps can explain safety and timing, while a PDF lists the ingredients and method.
This mix is useful because the formats reinforce specific parts of the task. The video shows movement, the text explains key points, and the PDF stays handy in the kitchen.

More formats do not always make an online course better. Adding audio, a webinar, a video, and a long document to every lesson can make the course feel crowded.
Choose the material that helps learners understand or act. A simple concept may need only a clear explanation and one practice question, while a technical skill may need a demonstration.
Think about how learners will use each lesson, including whether they need to pause, repeat, or refer back to it. A useful course builder lets you adapt the layout to those needs.
Once your lessons fit your learners, consider how to offer the finished course and accept payment.
Feature 3: How Can You Sell Courses Through GetResponse?
Course sales need both an offer learners understand and a working payment method. A clear offer tells buyers what they get, while a connected processor handles the payment.
GetResponse supports selling a course as a paid product, with Stripe and PayPal identified as payment integrations. A stated 0% transaction-fee offer does not remove processor charges or other plan costs.
| Offer | Payment handling | Example use |
|---|---|---|
| Free access | No course payment required | A free learning resource |
| Paid course with Stripe | Stripe processes the payment | A one-time course purchase |
| Paid course with PayPal | PayPal processes the payment | A buyer choosing PayPal |
The table shows that payment choice depends on how you offer access. A free resource needs no course payment, while a paid course needs a clear path from offer to checkout.

Stripe and PayPal process payments under their own terms. Their charges are separate from a platform’s transaction fees and subscription costs.
The Content Monetization plan is described as having 0% transaction fees. Check the current plan terms, including what counts as a transaction fee and which costs remain.
Before you sell online courses, make sure the course promise, access details, and price are easy to understand. A buyer should know what they are paying for before reaching checkout.
That sales setup connects to the next question: which marketing tools can bring prospective learners to your offer?
Feature 4: How Do the Built-In Marketing Tools Help You Promote a Course?
A prospective learner can reach a landing page, read about your course, and then receive follow-up emails. That first visit gives you a chance to explain the offer before asking for a sale.
Email marketing, landing pages, webinars, and marketing automation can support one course promotion workflow. These tools work best when you know your audience and can state the offer clearly.
A landing page can introduce the course, explain who it serves, and invite visitors to take a next step. A short email sequence can answer common questions about the course and its value.
A webinar can give interested learners a live introduction. You might teach one useful idea, explain how the full course builds on it, and invite attendees to learn more.
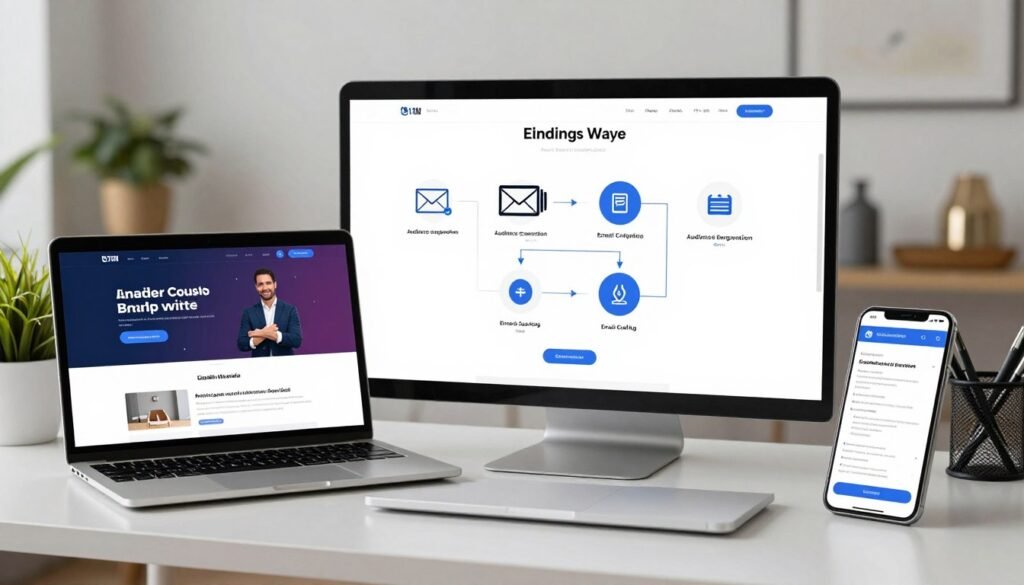
Marketing automation can help move people through planned messages based on their actions. For example, someone who signs up for a webinar may receive a reminder and a follow-up note.
Running these marketing tools in one platform can reduce the need to switch between separate services. It can also make your workflow easier to manage when your audience grows.
Still, a connected marketing platform cannot replace a clear offer or an audience that needs it. Your messages need to match the learner’s questions, not simply fill an email calendar.
Once learners enroll, the focus shifts from attracting them to supporting participation and collecting useful feedback.
Feature 5: What Can You Do to Engage and Learn From Students?
A learner finishes a lesson and needs a way to show what they understood. A quick check, such as a quiz or assignment, can reveal where they may need more practice.
Quizzes and assignments help you check understanding, while comments and ratings let learners share feedback. Ratings can offer social proof, but they do not prove every learner achieved the intended result.
A quiz can ask learners to choose a safe next step, while an assignment can ask them to apply a skill. These checks give you a better view of learning than lesson completion alone.
Comments can help learners ask questions or point out unclear instructions. Ratings can show how students felt about a course, but you should read comments for context.

GetResponse supports more than 170 integrations, which can connect the course workflow with other tools. Choose connections that solve a real need, such as organizing learner information or handling another task.
A course business can use these signals to spot lessons that need work. If learners often miss the same quiz question, the lesson may need a clearer explanation or another example.
Use engagement tools with a clear purpose:
- Check understanding with quizzes or assignments.
- Collect learner feedback through comments.
- Review ratings alongside written responses.
- Connect relevant external tools to your workflow.
These tools help you see how learners interact with course material. Next, weigh the trial access, plan fit, and total cost before you decide.
What Should You Check About GetResponse Pricing and the Free Trial?
The free trial can help you test the workflow, but plan limits and current terms still need checking. Use the trial to see how course creation and connected marketing tools fit your day-to-day work.
The 14-day free trial is described as offering premium features without requiring a credit card. A two-week test gives you time to try key tasks, though it cannot show how the platform will perform over a long period.
What the free trial lets you test
Try creating a course and checking whether the editing process feels clear. You can also test connected marketing tools and see how they fit your usual way of working.
Use a real course idea rather than a made-up sample. Add a few lessons, review the learner view, and test a basic promotion flow to find friction early.
A free plan and a free trial are different offers. The trial provides access to premium features for a set period, while a free plan may have separate limits and terms.

What to verify before choosing a plan
Before committing, check the current plan price, student limits, included tools, billing term, and transaction-fee terms. Compare the full cost, not just the advertised subscription amount.
Transaction fees differ from payment processor charges and subscription costs. A 0% transaction-fee offer on the Content Monetization plan does not mean Stripe or PayPal charges disappear.
Also check whether the plan includes the tools you need now and the student capacity you may need later. A low-cost option can become less useful if key features sit in a higher tier.
Once you know what you need to test and price, compare the GetResponse approach with other course builders.
How Does GetResponse Compare With Other Course Builders?
No single course builder is best for every creator. Your best fit depends on whether you value AI help, sales and marketing in one system, or a specific teaching workflow.
The feature-led comparison below shows different strengths, not a universal ranking. Choose by the work you need the platform to do, rather than by feature count alone.
| Platform | AI course help | Notable course or marketing strength |
|---|---|---|
| GetResponse | AI course builder | Email marketing, landing pages, and webinars |
| Teachable | AI outline builder | Course hosting and custom domains |
| Podia | No AI course tool listed | Storefront and email marketing |
| Kajabi | AI course generator | Combined course and marketing tools |
| Thinkific | Drag-and-drop course builder | Templates and live Zoom integration |
GetResponse may suit you if you want a course builder alongside email marketing, landing pages, and webinars. Those tools can support both course delivery and promotion in the same system.

Teachable emphasizes hosting and custom domains, while Podia pairs a storefront with email marketing. Kajabi brings course and marketing tools together, and Thinkific offers a drag-and-drop builder.
These differences matter in daily work. A creator who already has an audience may favor a delivery workflow, while a new seller may want more built-in promotion tools.
Think about where you want to manage learners, how you plan to reach them, and how much control you need over the selling process. That way, feature comparisons reflect your actual course business.
The comparison points toward a broader choice: which platform model fits your ownership, audience, and marketing needs?
Which Online Course Platform Model Fits Your Business?
You can keep course and marketing tools together, or combine specialist services. The right model depends on how much control you want and how much setup you are willing to manage.
All-in-one platforms combine course hosting, payment, and marketing. Standalone course software focuses on delivery and may require separate marketing tools.
All-in-one platforms for creation and promotion
An all-in-one marketing platform can keep course pages, payments, and promotion connected. This setup may suit online course creators who want fewer separate systems to manage.
Standalone course software puts more focus on teaching and course delivery. You may need to connect email, landing pages, or other marketing services on your own.
Choose based on the work you want to keep together. A connected setup can reduce switching, while separate tools may give you more freedom to pick each service.

Marketplaces and WordPress learning systems
Marketplaces place courses in a browsable catalog, which can help learners find new subjects. They can limit control over branding and customer access, and may take a share of sales.
WordPress learning management system plugins add course functions to a site you own. They can offer more control, but you take on setup and site management.
Enterprise learning management systems serve organization-wide training. They are designed for larger programs and the needs of teams, rather than a single creator’s course business.
| Platform model | Where the course is hosted | Typical fit | Main trade-off |
|---|---|---|---|
| All-in-one | Provider’s platform | Creators seeking connected tools | Less separation between systems |
| Marketplace | Marketplace catalog | Creators seeking marketplace discovery | Less control over branding and customer access |
| WordPress LMS | Creator’s WordPress site | Site owners seeking control | Added setup and site management |
| Enterprise LMS | Organization’s learning system | Larger training programs | Designed around organizational needs |
Each model solves a different problem. A marketplace centers discovery, a WordPress system centers site ownership, and an enterprise LMS centers group training.
Use these models to frame your choice, then apply a practical checklist to any option before you buy.
What Should You Check Before Choosing Course Creation Tools?
A creator can finish building lessons and then discover the chosen plan lacks a needed assessment or payment feature. Check the fit early, before your course depends on tools you cannot use.
Start with the teaching experience, then check how the platform handles sales and growth. A low entry cost can lose its appeal when key features require a higher tier or transaction fees apply.
Match the learning design to the course builder
Check whether the course builder feels easy to use and supports your lesson formats. Look at how it organizes modules and lessons, and whether quizzes or assignments match your teaching style.
Consider how you will track learner progress and whether learners can access the course in a useful way. Accessibility needs may affect the formats, layout, and controls you choose.
A polished feature list is not enough if the learning flow feels awkward. Try building a sample lesson that uses your actual materials and asks learners to do something.

Check payments, integrations, and room to grow
Check payment methods and transaction-fee terms before you build around a checkout path. Confirm that your current tools can connect, and check student limits against your likely enrollment.
Ask what happens when more learners join or you need more features. A low starting cost may not stay low if growth pushes you toward a higher plan.
Use this checklist to compare options:
- Ease of use, lesson formats, and lesson organization.
- Quizzes, assignments, progress tracking, and accessibility needs.
- Payment methods and transaction-fee terms.
- Connections to your existing tools and student limits.
- Plan changes and support for growing enrollment.
These checks help you focus on the tools your course truly needs. Once you have set your criteria, turn them into a focused launch workflow.
How Can You Build and Sell an Online Course With Confidence?
A confident launch comes from a clear offer, a checked learning experience, and a workable promotion plan. Confidence comes from preparation, not from assuming a platform will sell the course for you.
Test the course idea, review the learner experience, and make the path to purchase clear. A free trial can help you test the actual workflow, but trying software does not guarantee sales.
A course launch needs a clear offer, lessons that work for learners, and a practical way to reach buyers. Software can support that work, but it cannot promise a sale.
Validate the course offer before building
Choose a specific learner, a problem they face, and an outcome your course can help them reach. A broad offer such as “learn design” is harder to explain than a focused skill and result.
Check that the proposed course answers a real need. Talk with likely learners, review common questions, or test a small offer before you spend weeks building every lesson.
Make the promise clear without claiming more than your course can deliver. Learners should understand who the course is for and what they can expect to practice.

Create and review the learner experience
Arrange lessons in an order that moves learners toward the promised outcome. Start with the knowledge they need, then build toward harder tasks or more independent practice.
Add only useful media and assessments. A video should show something a text explanation cannot, while an assignment should give learners a chance to apply the skill.
Before publishing, review the course as a learner. Open each lesson, follow its instructions, test links, and check that the materials appear in the right order.
Pay attention to small points that can interrupt learning. A missing worksheet, unclear task, or broken link can turn a good lesson into a frustrating one.
Launch, measure, and improve
Prepare a landing page that explains the course and tells visitors what to do next. Use email marketing to reach interested people with clear details and answers to common questions.
Make the payment path easy to follow, then check it before you invite buyers. Gather learner feedback after enrollment and look at engagement data as students move through lessons.
If learners stop at the same point or miss the same assessment, review that lesson. Clearer steps, another example, or a better practice task may help learners continue.
A simple five-step plan can keep the work focused:
- Define the target learner and outcome.
- Draft the course structure.
- Build and review lessons.
- Prepare the sales page and payment path.
- Launch, collect feedback, and refine.
Each step gives you something concrete to check before moving ahead. The free trial can show whether the actual course and promotion workflow fits your needs.
Choose one next action based on the biggest gap in your current course workflow, then use it to move toward launch.
Conclusion
GetResponse is worth considering when you want course creation and marketing tools in one platform. That connected setup may suit you if you prefer to manage teaching and promotion together.
The best fit still depends on your budget, audience, and preferred teaching workflow. Use the free trial to test course building and promotion with a real lesson idea.
Your next step is simple: draft an AI course outline, review it, and test whether the platform supports the learner experience you intend to create.